If you own an RV without a good gutter system, then chances are you’ve had issues with water leakage and/or discoloration. Unfortunately, most of the older RV models don’t have gutters already built into them. Plus, even though most modern RVs come equipped with gutter systems, sometimes they can’t withstand heavier downpours.
Luckily for you, it’s easy and inexpensive to install your RV gutters, provided you have the right equipment. We've researched the issue in-depth and bring you some insights on the topic.
There are two common ways to install RV gutters. The easier way is to use flexible plastic gutters that already have an adhesive coating on the back. After cleaning your RV with alcohol and water, simply peel away the coating o n the back of this gutter and stick it to the RV’s surface. For those who are more interested in DIY projects, you could create a gutter using PVC pipe. For this method, you’ll have to cut the desired length of a PVC pipe in half and attach it to your RV with screws.
Don’t worry if you need more instructions. Below, you’ll find all of the tips you need to know whether you’re using the first or second method. Also, we’ll go over a few helpful strategies for keeping your gutters clean and preventing black streaks from forming. With a good dose of patience and a bit of skill, you should have gutters installed on your RV in no time.
The Top Two Methods For RV Gutter Installation
These two methods often come recommended by experienced RV'ers.
1. Installing Adhesive Gutters
As mentioned in the intro, the easiest way to add gutters to your RV is to purchase a flexible lining that already has an adhesive coating on the back. You can easily find these products nowadays both in RV stores and online. Before purchasing these gutters, of course, be sure to measure the length you need for your RV.
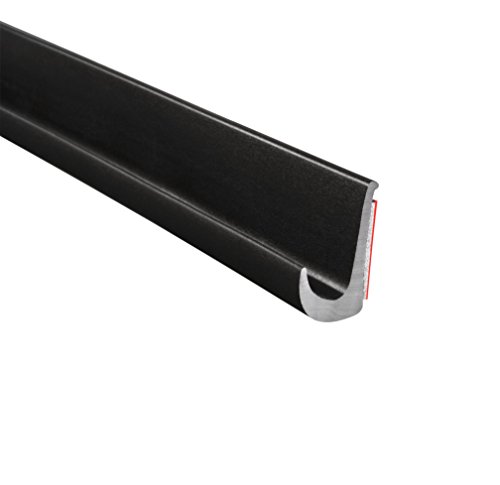
Click here to learn more about this product.
Once you’ve written down the ideal gutter length for your RV, it’s important to thoroughly clean the surface area you intend to place these gutters on. Grab a clean towel or rag, dip it into rubbing alcohol and water, and gently wipe the RV’s surface. This simple step will help your gutter better adhere to the RV’s surface.
At this point, you could put some painter’s tape across the area where you’re going to place your gutter. This step is optional, but it will help guide you as you stick the gutter on your RV. This tip is especially useful if you’re putting your gutter around the curves of a window.
With all that prep work out of the way, it’s finally time to break out your gutter and start sticking it to the RV. It’s highly recommended you remove the paper protecting the adhesive as you need to. Try your best not to touch the adhesive with your fingers because this will make it difficult for the gutter to stick to the RV.
Once you’ve applied the gutter to the RV, either use your fingers or an object like a toothbrush handle and vigorously rub the gutter all the way across. Creating a bit of heat between the handle and the gutter will really help the gutter stick to the RV’s surface. Lastly, let this gutter dry for at least three days before taking your RV on a rainy road trip.
PVC Pipe Method
If you have an RV with an existing groove on top and no existing gutter system, then you could use PVC pipes to create a DIY drainage system. Just like with the adhesion gutters, you’ll first have to measure the length of PVC pipes you need to successfully cover your RV.
People who’ve used this method recommend purchasing a PVC that’s between ¾ and up to 2 inches. Once you have your measurements, cut your scheduled 40 PVC pipe in half.
You’ll next have to fit the PVC pipe in the groove on the top of your RV. Once you’ve placed the PVC pipe in the groove, drill in a few small screws so it will stay in place. You should also attach a piece of a full PVC pipe on the end to act as a drainage spout.
Already have a gutter? Add the spouts
To avoid black water streaks on the body of your rig, you may want to add extensions for the water spouts. These are an option regardless of what kind of gutter you have. Just buy a kit like this one and follow the directions.

Click here to purchase this product on Amazon.
Gutter Maintenance & Cleaning Tips
Now that you have gutters on your RV, you have to worry about cleaning them out every once in a while. This is especially true if you’re camping during the autumn season when all those dead leaves start falling from trees.
How to Easily Clean RV Gutters
Of course, you could break out the ladder and remove leaves by hand, but there are many less time-consuming methods to consider. Probably the easiest way to get those leaves out of your gutters is to use a hose that has an extension on the top.
With this extension, you should easily be able to push out leaves without having to climb up. If you prefer using air power, then you could place an extension on an air blower and push leaves out that way.
Drain Off Excess Water: The Alligator Clip Hack
We've mentioned adding waterspouts that will keep water away from your RV. There is a hack that can achieve something similar.
People who are still having issues with rain drainage after installing an RV gutter might be interested in this easy alligator clip hack. This inexpensive tip will help divert water away from your RV in areas where it tends to cause a problem.
First, buy a few alligator clips online or at a local hardware store. Next, cut a few inches of thin wire. Run the wire through an alligator clip and crimp it into place so it won’t fall out. Now, find places where the water from your RV tends to run off and attach the clip to that area. You’ll soon notice the rainwater naturally flows through the cable and away from your vehicle.
Get Rid Of Those Black Streaks
Even with a great gutter system, discoloration and black marks are inevitable over time. This is especially true if you frequently go camping in areas that get a lot of rainfall.
Not only are black streaks ugly, but they can also chip away at your RV’s paint if you leave them on for long enough. For this reason, you should prioritize getting rid of black soot as soon as it appears on your RV.
One popular way RV enthusiasts use to get rid of black streaks is to mix half a gallon of Clorox with a few squirts of Palmolive liquid soap and scrub the RV’s surface with a car brush. Bleach will naturally whiten your RV’s surface, so this is a great method if the paint on your RV is a lighter shade. Just apply this mixture with your brush all over your RV and let it sit for a few minutes. Next, wash off this treatment with water and let your RV dry.
Since most of the black soot trickles down from the RV’s roof, the best thing you could do is regularly give the roof a good scrub. You could use the Clorox and Palmolive method listed above, or you could purchase a commercially available cleaning solution at a hardware store. The more often you clean your roof, the better off your RV will be in the long run.
Installing RV Gutters: A Great Long-Term Investment
Whatever method you decide to use, installing RV gutters is a great decision. While you’ll still need to regularly clean your RV to avoid discoloration, these gutters will make that job a whole lot easier. Installing good gutters can also help you prevent leaking, especially through your RV’s windows. As you could see, there are tremendous benefits for the longevity of your vehicle if you take the time to properly install gutters.
It really helped when you said that there are easier ways to clean gutters installed on RV vehicles. While I don’t have an RV, I have a friend who does, and they’ve been looking to install a gutter on their mobile home. He’s searching for a way to be able to easily install one while saving money at the same time.
So glad this helped! Thanks for leaving a comment!
Rain gutters will surely help to drain water during heavier downpours but will not prevent water leakages. For that I highly recommend superior roof sealant RV Roof Magic. It Provides a seamless membrane. Never worry about water leakages ever again and will withstand ponding water 365 days a year.